- Here the list of most important Spring Boot interview questions
- 1. Explain the Spring Boot Key Components?
- 2. Tell Some List of Sprint Boot Actuator EndPoints
- 3. Tell us some benefits of Spring Boot over Spring?
- Features provided by spring boot but spring doesn’t
- Key Benefits of Spring Boot over Spring:
- 4. What is the starter dependency of the Spring boot Module?
- Some of Spring Boot Starter Dependencies are
- 5. What is Spring Boot dependency management?
- How It Works (Maven Example)
- 6. How does Spring Boot work Internally?
- 7. Explain Auto Configuration in Spring Boot.
- @EnableAutoConfiguration
- Example to use @EnableAutoConfiguration
- @SpringBootApplication
- 8. How does a Spring Boot Application get started?
- 9. Tell some commonly used Spring Boot CLI commands.
- 10. Tell Some Basic Annotations Used in Spring Boot?
- Some Common Spring Boot Annotations are
- Some More annotations of Spring Boot are
- 11. What is Spring Boot dependency Management?
- 12. How you can Change the Port of the embedded Tomcat server in Spring Boot?
- 13. How you can change the Tomcat server to any other Server in Spring Boot?
- 14. What is @RestController annotation in Sprint boot?
- 15. What is the difference between @Controller and @RestController?
- Using @Controller
- Using @RestController:
- 16. What is the difference Between RequestMapping and GetMapping?
- Key Differences
- Example Using @RequestMapping
- Example Using @GetMapping:
- 17. What is Actuator in Spring Boot?
- 18. What is the process to enable Actuator in the Spring boot application?
- Enable Actuator in the Spring boot application
- 19. Tell some endpoint actuator-provide to monitor the Spring boot application?
- Common Spring Boot Actuator Endpoints are
- 20. What is the use of Profiles in spring boot?
- 21. What is dependency Injection in Spring Boot?
- There are 3 ways to inject the dependencies
- 22. What is an IOC container?
- What IOC container Do?
- Spring IoC Container Types:
- 23. Tell the steps how you will create a spring boot project using Spring Initializer.
- Steps to create a spring boot project
- 24. Tell me the Advantages of the YAML file Over Properties file.
- 25. Tell some difference between @RequestParam vs @PathVariable Annotations.
- @PathVariable
- @RequestParam
- Some More Difference are:
- 26. Tell something about Spring @GetMapping, @PostMapping, @PutMapping, @DeleteMapping and @PatchMapping
- @GetMapping
- @PostMapping
- @PutMapping
- @PatchMapping
- @DeleteMapping
- 27. What is Thymeleaf in Spring Boot?
- 28. Tell some embedded containers supported by Spring Boot.
- 🔚 Conclusion
Are you struggling to find the most important and frequently asked Spring Boot interview questions especially the ones asked in face-to-face interviews by top MNCs like TCS, Infosys, LTI Mindtree, Accenture, Tech Mahindra, PWC, KPMG and Others? If yes, take a deep breath, because you’ve landed at the right place!
This blog post is well-suited for Java and Spring Boot developers ranging from freshers to professionals with 3 to 4 years of experience, who are preparing for interviews that go beyond just the basics. Whether you’re currently working with Spring Boot or transitioning into backend development, this list of questions will help you build confidence and deepen your understanding of real-world Spring Boot scenarios.
These questions are not randomly collected from the internet. Instead, the author, Prakash Kumar, has personally attended 50–60+ technical interviews in his 7 years of professional experience and compiled this list based on real-world interview patterns, scenarios, and practical challenges, especially from top service-based and product-based companies asked in actual interviews.
He know that It is very tough for fresher candidate as well as experienced candidate while working in company or preparing for college curriculum to prepare for an interview or to finding some great bunch of right questions that cover the most important topics.
In this Post, He has tried to cover all important and most asked Spring Boot programming interview questions that will help you to crack the interview. This resource is very helpful for fresher to upto 3-4 years of exp and if you are more experienced then please check Spring Boot Interview Questions for 4+ Year Experience.
And alone preparing spring boot is not enough, you should also prepare Java, Java 8 topics. Below I have shared the list of the resources, you can check them.
To take your preparation even deeper, make sure to check out:
🔗 Java 8 Scenario-Based Questions Using Employee Class — highly practical for object-based coding interviews.
🔗 Java 8 Real-World Scenario Coding Questions — a perfect list if you’re aiming to stand out in the logic round.
🔗Java Programming Interview Questions for Freshers & Experienced (2025) — a perfect list to prepare java interview questions.
🔗Java Interview Questions for Experienced – Asked in MNCs — If your dream is MNCs, don’t forgot to check this out.
Let us start Preparing.
Here the list of most important Spring Boot interview questions
1. Explain the Spring Boot Key Components?
There are four important key components of spring-boot are
- Spring Boot auto-configuration.
- Spring Boot CLI.
- Spring Boot starter POMs.
- Spring Boot Actuators.
There are two more Spring Boot components
- Spring initializr: To quick start new Spring Boot projects
- Spring Boot IDEs: We have multiple Spring Boot IDEs for example : Eclipse IDE, IntelliJ IDEA, Spring STS Suite etc.
2. Tell Some List of Sprint Boot Actuator EndPoints
Some of Spring Boot Actuator End Point are:
- auditevents: This endpoint Exposes the audit events information for the current application.
- beans: Displays the list of all the Spring beans of application.
- health: Display the health information of spring boot application.
- caches: Exposes the all available caches.
- env: Exposes the all properties from Spring’s ConfigurableEnvironment.
- metrics: It Shows the ‘metrics’ information for the current application.
There are some more Spring Actuator endpoints are loggers, mappings, sessions, shutdown, flyway, conditions, etc.
3. Tell us some benefits of Spring Boot over Spring?
Spring boot framework is the extension of spring framework to help developers to start coding with low configuration. It eliminates the boilerplate configurations required for setting up a Spring application.
Spring Boot comes with multiple starter dependencies for different Spring modules, Some listed below
- spring-boot-starter-web
- spring-boot-starter-data-jpa
- spring-boot-starter-security
- spring-boot-starter-test
- spring-boot-starter-thymeleaf
- spring-boot-starter-actuator
Features provided by spring boot but spring doesn’t
- Version Management
- Starter POM
- Auto Configuration
- Component Scanning
- Embedded server
- InMemory DB
- Actuators
Key Benefits of Spring Boot over Spring:
- Auto Configuration
Spring Boot automatically configures your application based on the dependencies you add in yourpom.xmlorbuild.gradlefile. This reduces the need for manual configuration in XML or Java classes. - No XML Configuration Required
Traditional Spring applications often rely heavily on XML configuration. Spring Boot eliminates this by promoting Java-based configuration, leading to cleaner and more maintainable code. - Embedded Servers
Spring Boot provides embedded servers like Tomcat, Jetty, or Undertow. You can run your application just by executing amain()method—no need to deploy WAR files on external servers. - Starter Dependencies
Spring Boot offers “starters” — curated dependency descriptors for common use cases (like web, JPA, security). This saves time figuring out which libraries and versions to include. - Production-Ready Features (Actuator)
It provides built-in monitoring and management features through Spring Boot Actuator, including health checks, metrics, application info, etc., which are essential in real-world production systems. - Reduced Boilerplate Code
Spring Boot handles many configurations behind the scenes, allowing developers to focus more on business logic rather than setup. - Easy to Create Standalone Applications
Spring Boot applications are self-contained and executable JARs. They can be run usingjava -jarwithout the need for external servers. - Rapid Development and Prototyping
Developers can quickly build and test Spring Boot applications, making it an ideal choice for agile development and microservices architecture. - Built-in DevTools
It includes developer tools like auto-restart, live reload, and configuration for fast development feedback. - Better Integration with Microservices
Spring Boot is designed to work well with Spring Cloud, making it easier to build scalable, distributed systems and microservices.
4. What is the starter dependency of the Spring boot Module?
Ans: The starter dependency in Spring Boot is a pre-defined set of dependencies (libraries) that you can include in your pom.xml (for Maven) or build.gradle (for Gradle) to quickly get started with a specific functionality like web, JPA, security, etc. without having to manually include each library one by one.
Some of Spring Boot Starter Dependencies are
1). Spring Boot Starter web: Important features of spring-boot-starter-web are It is compatible for web development and Provides Auto configuration. This spring-boot-starter-web dependency pulls all dependencies which is used in the Spring Boot web development.
Below is the code to add Spring Boot Starter web in Spring Boot project using POM.xml.
<dependency>
  <groupId>org.springframework.boot</groupId>
  <artifactId>spring-boot-starter-web</artifactId>
</dependency>
2). Spring Boot Starter Actuator : This dependency is used to monitor and manage the Spring Boot application. Below is the code to add Spring Boot Starter Actuator in Spring Boot project using POM.xml.
<dependency>
  <groupId>org.springframework.boot</groupId>
  <artifactId>spring-boot-starter-actuator</artifactId>
</dependency>
3). Spring Boot Starter Security: This dependency is used in Spring Boot application to add the Security in Spring Boot Application.
Below is the code to add Spring Boot Starter Security in Spring Boot project using POM.xml.
<dependency>
  <groupId>org.springframework.boot</groupId>
  <artifactId>spring-boot-starter-security</artifactId>
</dependency>
4). Spring Boot Starter ThymeLeaf : Spring Boot Starter ThymeLeaf Dependency is used to create a web application. It provides a good support for serving a XHTML/HTML5 in web applications.
Below is the code to add Spring Boot Starter ThymeLeaf in Spring Boot project using POM.xml.
<dependency>
  <groupId>org.springframework.boot</groupId>
  <artifactId>spring-boot-starter-thymeleaf</artifactId>
</dependency>
5). Spring Boot Starter Test: This dependency is used in Spring Boot Application to write the Unit Test cases of Java methods. Below is the code to add Spring Boot Starter Test in Spring Boot project using POM.xml.
<dependency>
  <groupId>org.springframework.boot</groupId>
  <artifactId>spring-boot-starter-test</artifactId>
</dependency>
5. What is Spring Boot dependency management?
Spring Boot dependency management system manages dependencies and configuration automatically. We need not to specify the version of the dependencies in our configuration file. Spring Boot automatically upgrades all dependencies added in the configuration file when we update the Spring Boot version. It manages both dependencies and their compatible versions automatically so developers don’t have to do it manually.
How It Works (Maven Example)
Using Spring Boot’s parent POM:
<parent>
    <groupId>org.springframework.boot</groupId>
    <artifactId>spring-boot-starter-parent</artifactId>
    <version>3.2.0</version>
</parent>
Once this is set, you can add dependencies without specifying versions
<dependency>
    <groupId>org.springframework.boot</groupId>
    <artifactId>spring-boot-starter-data-jpa</artifactId>
</dependency>
6. How does Spring Boot work Internally?
When we Create Spring Boot Application we add the starter Dependencies in it. This Starter Dependencies automatically configures Spring Boot application based on the dependencies you have added to the project. We add @EnableAutoConfiguration annotation for the configuration.
Suppose if you have not configured any database connection, Spring Boot auto-configures an in-memory database.
The entry point of the spring boot application is the class containing @SpringBootApplication annotation and the main method.
@ComponentScan annotation scans all the components included in the Spring Boot Application automatically.
Read in details here: How does Spring Boot work Internally
7. Explain Auto Configuration in Spring Boot.
Spring Boot Auto Configuration is a powerful feature that automatically configures Spring application based on the dependencies we have added in the project/present in classpath.
When we include libraries (like Spring Web, JPA, Security, etc.) in your project, Spring Boot checks for the presence of specific classes and automatically configures beans, data sources, and other components required for those features.
To enable auto-configuration, we use either:
@EnableAutoConfiguration: Directly tells Spring Boot to auto-configure the application.@SpringBootApplication: This is a meta-annotation that includes@EnableAutoConfigurationalong with@Configurationand@ComponentScan.
@EnableAutoConfiguration
It enables Spring Boot’s auto-configuration mechanism. Based on the dependencies present in your classpath, it will try to configure beans automatically (like setting up a web server, database, etc.). It does not scan your components (like @Controller, @Service, @Repository, or @RestController) unless you explicitly add @ComponentScan. Also it does not declare the class as a configuration class, unless you also add @Configuration.
Example to use @EnableAutoConfiguration
import org.springframework.boot.SpringApplication;
import org.springframework.boot.autoconfigure.EnableAutoConfiguration;
@EnableAutoConfiguration
public class SpringBootApplicationDemo {
   public static void main(String[] args) {
      SpringApplication.run(SpringBootApplicationDemo.class, args);
   }
}
@SpringBootApplication
Class that contains @SpringBootApplication annotation denotes the entry point of the Spring Boot Application. This class should have the main method to run the Spring Boot application. @SpringBootApplication annotation includes Auto- Configuration, Component Scan, and Spring Boot Configuration.
If we add @SpringBootApplication annotation in java class, we need not to add any other annotation like @EnableAutoConfiguration, @ComponentScan and @SpringBootConfiguration.
We can say @SpringBootApplication = @EnableAutoConfiguration + @ComponentScan + @SpringBootConfiguration.
Example to use @SpringBootApplication
import org.springframework.boot.SpringApplication;
import org.springframework.boot.autoconfigure.SpringBootApplication;
@SpringBootApplication
public class SpringBootApplicationDemo {
   public static void main(String[] args) {
      SpringApplication.run(SpringBootApplicationDemo.class, args);
   }
}
8. How does a Spring Boot Application get started?
Spring Boot application Looks for the class having @SpringBootApplication annotation with the main method. This method serves as an entry point, which invokes the SpringApplication.run method to start the application.
@SpringBootApplication
public class SpringBootApplicationDemo{
       public static void main(String[] args) {
             SpringApplication.run(SpringBootApplicationDemo.class);
       }
}
9. Tell some commonly used Spring Boot CLI commands.
Some commonly used Spring Boot CLI Commands Are:
-run, -test, -install, -uninstall, -grap, -jar, -war, –init, -shell, -help etc.
10. Tell Some Basic Annotations Used in Spring Boot?
The Spring Boot annotations reside in its org.springframework.boot.autoconfigure package and its sub-packages.
Some Common Spring Boot Annotations are
1). @EnableAutoConfiguration – It makes Spring Boot look for auto-configuration beans on its classpath and automatically apply them.
2). @SpringBootApplication – This annotation is used to denote the main class of a Boot Application. This annotation combines @Configuration, @EnableAutoConfiguration, and @ComponentScan annotations with their default attributes.
Some More annotations of Spring Boot are
For Application Basic Setup
- @SpringBootApplication
- @ComponentScan
- @Configuration
- @EnableAutoConfiguration
For Request Response
- @GetMapping
- @PostMapping
- @RequestMapping
For Component Types
- @Repository
- @Service
- @Component
- @Controller
11. What is Spring Boot dependency Management?
Spring Boot provides automatic dependency management that manages dependencies and configuration automatically. We don’t need to mention the version of the dependencies in our configuration. You don’t need to specify the version of most dependencies manually in your configuration file (pom.xml or build.gradle).
Dependency Management as it is a way to manage dependencies efficiently in one place, also known as a Bill of Materials (BOM), to ensure that all dependencies are compatible with each other.
12. How you can Change the Port of the embedded Tomcat server in Spring Boot?
There are two ways to change the default port of the server in Spring Boot
1). Using application.properties file
server.port = 8081In the application.properties file just change the default value of the port to the value that you wanted to be. Here we have given 8081 as a new port value.
2). Using application.yaml file
Server:
   Port:8081
Also, you can change the port value from application.yaml by changing the default value of the port to the value that you wanted to be. Here we have also given 8081 as a new port value.
13. How you can change the Tomcat server to any other Server in Spring Boot?
To Replace the embedded tomcat server in Spring Boot first we have to exclude the default server from the pom.xml. And to add a new server we will add the new dependency.
Example
To exclude tomcat from starter dependency add the below code in pom.xml
<dependency>
  <groupId>org.springframework.boot</groupId>
  <artifactId>spring-boot-starter-web</artifactId>
  <exclusions>
   <exclusion>
    <groupId>org.springframework.boot</groupId>
    <artifactId>spring-boot-starter-tomcat</artifactId>
   </exclusion>
  </exclusions>
</dependency>
And to include a new server add as a dependency. Below is an example to add a jetty server.
<dependency>
  <groupId>org.springframework.boot</groupId>
  <artifactId>spring-boot-starter-jetty</artifactId>
</dependency>
14. What is @RestController annotation in Sprint boot?
@RestController annotation is a combination of @Controller and @ResponseBody annotation. It is used to make restful web services and also it converts the response to JSON or XML using HTTP message converters. This annotation is used at the class level and it allows the class to handle the requests made by the client.
@Controller – Marks the class as a Spring MVC controller.
@ResponseBody – Tells Spring to convert the returned object into a response body (usually JSON or XML).
Example
@RestController
public class HelloController {

    @GetMapping("/hello")
    public String sayHello() {
        return "Hello, Spring Boot!";
    }
}
In the example above, the response "Hello, Spring Boot!" is returned directly as the HTTP response body in plain text or JSON (if it’s an object).
15. What is the difference between @Controller and @RestController?
@Controller is used to mark a class as a Spring MVC controller, where methods typically return views (HTML pages).
@RestController is used to create RESTful web services, where methods return data (like JSON or XML) directly to the client. @RestController is essentially @Controller + @ResponseBody.
| Feature | @Controller | @RestController |
|---|---|---|
| Purpose | Prepares a model and returns a view (like JSP, Thymeleaf) | Returns data directly as HTTP response (REST APIs) |
| Return Type | Returns logical view name | Returns object/data (auto-converted to JSON/XML) |
Need for @ResponseBody | ✅ Yes, must be added to each method returning data | ❌ Not needed — applied automatically |
| Use Case | Traditional web applications | RESTful APIs |
| Introduced In | Spring 2.0 | Spring 4.0 |
| View Rendering | Yes (e.g., HTML via templates) | No view rendering — returns raw data |
| Annotation Combination | Just a controller | Combines @Controller + @ResponseBody |
Using @Controller
@Controller
public class MyController {
    @GetMapping("/home")
    public String homePage(Model model) {
        model.addAttribute("msg", "Welcome!");
        return "home"; // returns a view named home.html
    }

    @GetMapping("/data")
    @ResponseBody
    public String getData() {
        return "Hello Data"; // returns plain text or JSON
    }
}
Using @RestController:
@RestController
public class MyRestController {
    @GetMapping("/data")
    public String getData() {
        return "Hello Data"; // automatically returned as HTTP response
    }
}
16. What is the difference Between RequestMapping and GetMapping?
@RequestMappingis a general-purpose annotation used to map HTTP requests (GET, POST, PUT, DELETE, etc.) to handler methods or classes in a controller.@GetMappingis a specialized shortcut for@RequestMapping(method = RequestMethod.GET). It is used specifically to handle HTTP GET requests, making the code more readable and expressive.
Key Differences
| Feature | @RequestMapping | @GetMapping |
|---|---|---|
| HTTP Methods Supported | GET, POST, PUT, DELETE, PATCH, etc. | Only GET |
| Level of Use | Can be used at class or method level | Typically used at method level |
| Readability | Less concise | More readable and specific |
| Introduced In | Spring 2.5 | Spring 4.3 |
Example Using @RequestMapping
@RequestMapping(value = "/hello", method = RequestMethod.GET)
public String sayHello() {
    return "Hello from RequestMapping";
}
Example Using @GetMapping:
@GetMapping("/hello")
public String sayHello() {
    return "Hello from GetMapping";
}
@RequestMapping can handle all HTTP methods and is more flexible, while @GetMapping is a cleaner and more concise way to handle only GET requests.
17. What is Actuator in Spring Boot?
An actuator in Spring Boot is a feature that helps you to monitor and manage your application when you push it to production. It provides built-in endpoints that expose useful operational information about the running application. These actuators include auditing, health, CPU usage, HTTP hits, metric gathering, and many more that are automatically applied to your application.
18. What is the process to enable Actuator in the Spring boot application?
To enable the spring actuator feature, we need to add the dependency of “spring-boot-starter-actuator” in pom.xml.
Enable Actuator in the Spring boot application
<dependency>
    <groupId>org.springframework.boot</groupId>
    <artifactId>spring-boot-starter-actuator</artifactId>
</dependency>
19. Tell some endpoint actuator-provide to monitor the Spring boot application?
Actuators provide below pre-defined endpoints to monitor our application .
Common Spring Boot Actuator Endpoints are
| Endpoint | Description |
|---|---|
/actuator/health | Shows the health status of the application (e.g., “UP”, “DOWN”). |
/actuator/info | Displays application info like version, name, etc. (from application.properties). |
/actuator/beans | Lists all Spring beans in the application context. |
/actuator/mappings | Shows all available HTTP request mappings and the methods that handle them. |
/actuator/configprops | Displays all @ConfigurationProperties beans and their values. |
/actuator/httptrace | Shows the last few HTTP requests and responses (needs additional dependency). |
/actuator/heapdump | Generates a heap dump file of the JVM (for memory analysis). |
/actuator/threaddump | Shows thread dump of the JVM. Useful for debugging deadlocks or performance. |
/actuator/shutdown | Gracefully shuts down the Spring Boot application (must be explicitly enabled). |
20. What is the use of Profiles in spring boot?
To Complete the development process of an application or we can say during the development of any application, we deal with multiple environments such as dev, test, and Prod.
Spring Boot profiles allow you to keep environment-specific configurations clean, separate, and manageable. This helps you run the same application code in different environments with different settings.
For example:
- In the dev environment, you might use an embedded H2 database.
- In the prod environment, you might connect to a proprietary Oracle database.
A profile is a set of configuration settings. Spring Boot allows to the definition of profile-specific property files in the form of application-{profile}.properties. It automatically loads the properties in an application.properties file for all profiles, and the ones in profile-specific property files only for the specified profile.
How It Works:
- Spring Boot always loads
application.propertiesorapplication.ymlas a base configuration. - Then, it overrides or adds values from the file that matches the active profile.
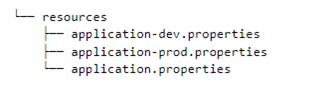
In application.properties
spring.profiles.active=dev21. What is dependency Injection in Spring Boot?
The process of injecting dependent objects into the target class is called dependency injection. Suppose our one class is dependent on another class object, In that case we will provide the other class object to our class. This process is known as dependency injection.
We can also define it as Dependency Injection (DI) is the process of injecting dependent objects into a target class, instead of the class creating its own dependencies. In simple terms, if one class depends on another, Spring provides that dependent object automatically, this process is called dependency injection.
Spring Boot (like Spring Framework) handles dependency injection automatically through annotations like @Autowired, @Component, @Service, and @Repository.
Check here how internally it work: How Spring Boot Handles Dependency Injection Using Annotations
There are 3 ways to inject the dependencies
1. Constructor Injection
This method involves injecting dependencies through the class constructor. It is the recommended approach by the Spring team because it allows you to declare your dependencies as final, ensuring they are not subsequently altered.
@Component
public class MyService {
    private final MyRepository myRepository;
    @Autowired // Optional in recent Spring versions for single-constructor scenarios
    public MyService(MyRepository myRepository) {
        this.myRepository = myRepository;
    }
}
2. Setter Injection
With setter injection, dependencies are injected through setter methods in the class. This method is useful when working with optional dependencies or when you need to reconfigure beans after they’ve been constructed.
@Component
public class MyService {
    private MyRepository myRepository;
    @Autowired
    public void setMyRepository(MyRepository myRepository) {
        this.myRepository = myRepository;
    }
}
3. Field Injection
Field injection involves marking a class field with @Autowired to let Spring inject the dependency directly into the class without explicit setter or constructor.
@Component
public class MyService {
    @Autowired
    private MyRepository myRepository;
}
22. What is an IOC container?
IoC Container is a framework for implementing automatic dependency injection. It manages object (beans) creation and its life-time and also injects dependencies into the class.
What IOC container Do?
- Creates objects (beans)
- Manages their lifecycle
- Resolves and injects dependencies between objects automatically
This is what enables loose coupling in Spring applications, the objects don’t create their own dependencies; instead, the container provides them.
Spring IoC Container Types:
BeanFactory– Lightweight, basic container.ApplicationContext– Advanced container (extendsBeanFactory) and is widely used in Spring Boot apps.
23. Tell the steps how you will create a spring boot project using Spring Initializer.
Spring Initializr is a web tool provided by Spring. Using this tool we can create Spring boot projects by providing project details and giving the jar dependencies details needed for our project.
Steps to create a spring boot project
- First, go to the browser and browse for spring intializr.
- Now Choose the project type maven. Give the details like project name, Group and Artifact details, etc. Now select the required dependencies for the projects. Click on Generate Project and it will download a project to your system.
- After the download of the project extracts this project into your system.
- Open your IDE like eclipse, IntelliJ or STS and import the downloaded and extracted project file using the import project option in IDE.
- After the import project will take some time to internal build and download the dependencies.
- Now you are done with the creation of the spring boot project.
24. Tell me the Advantages of the YAML file Over Properties file.
- The advantage of the YAML file over the properties file in Spring Boot is, that YAML Stores data in a hierarchical format but the properties file does not.
- YAML file makes easy to read and debug the file for developers.
- The SpringApplication class supports the YAML file as an alternative to properties whenever you use the SnakeYAML library on your classpath.
- One more great advantage of YAML is, suppose we have different deployment profiles such as development, testing, or production, so instead of creating new files for each environment, we can place all the details in a single YAML file. Which is not possible in the case of the properties file.
25. Tell some difference between @RequestParam vs @PathVariable Annotations.
@RequestParams extract values from the query string and @PathVariables extract values from the URI path.
@PathVariable
Suppose our url structure is http://localhost:8080/springproject/xyz
Then we will use @pathVariable annotation like below to extract some value from the URLs
@GetMapping("/springproject/{id}")
@ResponseBody
public String getIdUsingPathVariable (@PathVariable String id) {
return "ID: " + id;
}
Here id will be print as “xyz”
Or we can also write
@GetMapping("/springproject/{id}")
@ResponseBody
public String getIdUsingPathVariable (@PathVariable("id") String id) {
return "ID: " + id;
}
@RequestParam
Suppose our url structure is http://localhost:8080/springproject?id=xyz
Then we will use @ RequestParam annotation like below to extract some value from the URLs
@GetMapping("/foos")
@ResponseBody
public String getIdUsingRequestParam(@RequestParam("id") String id) {
return "ID: " + id;
}
Here id will be return as “xyz”.
Some More Difference are:
1). @RequestParam encoded the value from url but @PathVariable extracting values from the URI path is not encoded.
@PathVariable
Example:
If the url will be like http://localhost:8080/springproject/x+y
Output will be x+y
Here url value is not decoded.
@RequestParam Example:
http://localhost:8080/springproject?id=x+y
Output will be x y
Here url value is decoded
2). We can make @RequestParam and @PathVariable optional with the help of required attribute.
Below is a Program
@GetMapping("/optional/{id}")
@ResponseBody
public String getIdUsingPathVariable(@PathVariable(required = false) String id) {
  return "ID: " + id;
}
For Url http://localhost:8080/optional/xyz
Output will be xyz
And for Url http://localhost:8080/optional/
Output will be null
26. Tell something about Spring @GetMapping, @PostMapping, @PutMapping, @DeleteMapping and @PatchMapping
@GetMapping
- It is a shortcut for @RequestMapping(method = RequestMethod.GET).
- It is used to get single or all values from the database in Spring Application.
@PostMapping
- It is a shortcut for @RequestMapping(method = RequestMethod.POST)
- Method that has @PostMapping annotation is responsible to Create single or multiple entries in the database.
- It is used to create single or multiple value in the database in Spring Application.
@PutMapping
- It is a shortcut for @RequestMapping(method = RequestMethod.PUT)
- Method that has @PutMapping annotation is responsible to update the data in the database.
@PatchMapping
- It is a shortcut for @RequestMapping(method = RequestMethod.PATCH)
- @PatchMapping annotation is used when we want to apply a partial update on the database.
@DeleteMapping
- It is a shortcut for @RequestMapping(method =RequestMethod.DELETE)
- It is used to Delete single or multiple value from the database in the Spring Application.
27. What is Thymeleaf in Spring Boot?
Thymeleaf is a server-side Java-based template engine. It is used for both web and standalone environments. It is capable of processing HTML, XML, JavaScript, CSS and even plain text.
28. Tell some embedded containers supported by Spring Boot.
Ans: There are three embedded containers supported by Spring Boot are :
- Tomcat (used by default)
- Undertow
- Jetty
🔚 Conclusion
We hope these Spring Boot interview questions helped you strengthen your preparation and gain more clarity on key concepts. Whether you’re a fresher or an experienced professional, mastering these questions will boost your confidence during interviews.
If you found this blog helpful, do share it with your friends or colleagues preparing for Spring Boot interviews. Also, feel free to drop your doubts or any questions in the comments — we’d be happy to help!
📌 Looking for more?
👉 Check out our full list of Java Interview Questions or Microservices Interview Questions
📝 Stay tuned for more real-world interview tips and coding challenges!